Feb 25, 2020 - 4 min read
Targeting macOS with Xamarin.Forms
Archived Post
This post has been archived as its content is outdated.
If you haven’t developed anything with Xamarin.Forms before it is a UI framework for developing cross platform user interfaces on top of Xamarin. Out of the box it has official support for targeting iOS, Android & UWP (Windows 10 Universal Windows Platform), although it does support a number of other platforms these are still in preview this means not all features have been implemented and at the time of writing macOS is one of these platforms. If you would like you can read all about the platforms that Xamarin.Forms support check out the following link.
Let’s take a look at how you can add macOS as a target for your Xamarin.Forms application. I will be using Visual Studio for Mac as you won’t be able to add this platform using Visual Studio on windows.
Add Mac project
Once you have opened your Xamarin.Forms application in Visual Studio for Mac you need to do add a Mac project.
- Right-click on Xamarin.Forms solution and choosing Add -> Add New Project…
- In the window that pops up, scroll down the template list scroll down to Mac section and choose App, then select to the Cocoa App project template and click Next.
- Enter your App Name and Dock item if you want to change the name that appears in the dock, then click Next.
- Make sure you are happy with the configuration on the next page and select Create.
Note see video below to see these steps in action.
Add dependencies to Mac project
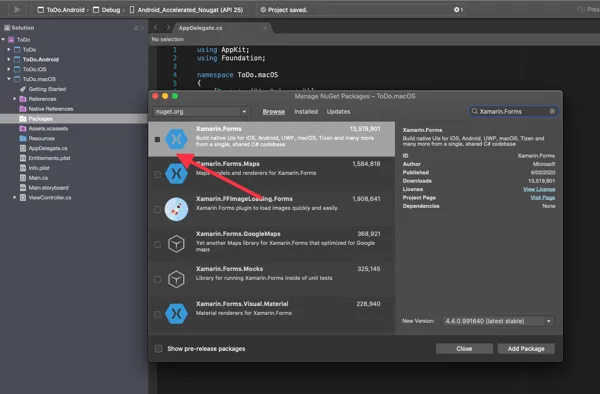
Let’s add the Xamarin.Forms NuGet package.
- Right click on the Packages folder in the Mac project, then select Manage NuGet Packages…
- In the window that appears install the Xamarin.Forms NuGet package. Make sure all the other projects are updated to use the same version of the Xaramin.Forms package.
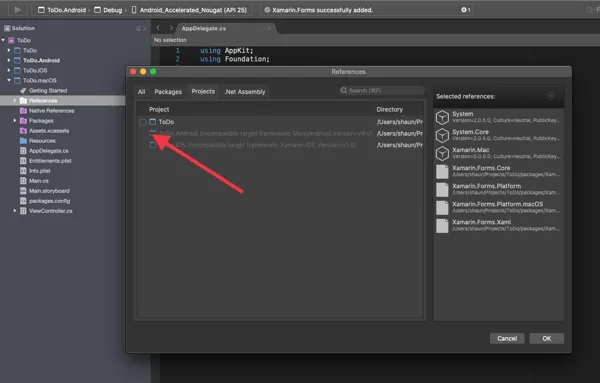
Now it is time to add the required reference to the Mac project.
- Right click on the References folder in the Mac project.
- In the references window Select the Projects tab and select the Xamarin.Forms project (this will either be a Shared Project or .NET Standard library).
Time to add some code
There is couple of files that need to be updated to initialise the Xamarin.Forms in the Mac project.
Main.cs
In Main.cs you need to add the following line in the Main method below NSApplication.Init();.
NSApplication.SharedApplication.Delegate = new AppDelegate();Your code should like this.
static class MainClass
{
    static void Main(string[] args)
    {
        NSApplication.Init();
       NSApplication.SharedApplication.Delegate = new AppDelegate();
        NSApplication.Main(args);
    }
}
AppDelegate.cs
The AppDelegate needs a little more change than Main.cs. Add the following usings to the top of your class.
using Xamarin.Forms;
using Xamarin.Forms.Platform.MacOS;
// also add a using for the Xamarin.Forms project
Next you need to change AppDelegate from inheriting from ApplicationDelegate to FormsApplicationDelegate
public class AppDelegate : FormsApplicationDelegateA new NSWindow object needs to be added and then initialised in this class so add the following code. Change the ctor code to personalise the window as required for your application.
NSWindow window;

public AppDelegate()
{
	var style = NSWindowStyle.Closable | NSWindowStyle.Resizable | NSWindowStyle.Titled;

	var rect = new CoreGraphics.CGRect(200, 1000, 1024, 768);
	window = new NSWindow(rect, style, NSBackingStore.Buffered, false);
	window.Title = "Xamarin.Forms on Mac!";
	window.TitleVisibility = NSWindowTitleVisibility.Hidden;
}

public override NSWindow MainWindow
 {
	get { return window; }
}
Now the window has been created you need to initialise Xamarin.Forms. To do this you need to add or update the follow method.
public override void DidFinishLaunching(NSNotification notification)
{
	Forms.Init();
	LoadApplication(new App());
	base.DidFinishLaunching(notification);
}
If you have following the above steps your AppDelegate should look like the following.
using Xamarin.Forms;
using Xamarin.Forms.Platform.MacOS;
// also add a using for the Xamarin.Forms project, if the namespace is different to this file
...
[Register("AppDelegate")]
public class AppDelegate : FormsApplicationDelegate
{
    NSWindow window;
    public AppDelegate()
    {
        var style = NSWindowStyle.Closable | NSWindowStyle.Resizable | NSWindowStyle.Titled;

        var rect = new CoreGraphics.CGRect(200, 1000, 1024, 768);
        window = new NSWindow(rect, style, NSBackingStore.Buffered, false);
        window.Title = "Xamarin.Forms on Mac!"; // choose your own Title here
        window.TitleVisibility = NSWindowTitleVisibility.Hidden;
    }

    public override NSWindow MainWindow
    {
        get { return window; }
    }

    public override void DidFinishLaunching(NSNotification notification)
    {
        Forms.Init();
        LoadApplication(new App());
        base.DidFinishLaunching(notification);
    }
}
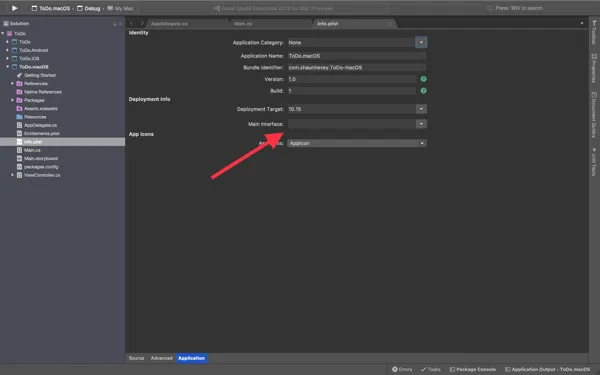
The last thing you need to do is remove the reference to the default storyboard.
- Open Info.plist and select the Application tab in the editor.
- Clear out Main Interface box to remove the reference to Main.storyboard.
Note you can now delete Main.storyboard if you would like.
Resources
You will now need to add any references e.g image files from your existing platforms that you application requires to run.
If all of this has worked you should now be able to run your Xamarin.Forms Mac application, as shown below.
