Every once in a while, I am amazed by some fantastic developer that changes my mind about what I can achieve on my iPhone or iPad. This is usually because they have made an application that I would have thought would never make it through Apple and their reviewers. One of these developers is Nicolas Holzschuch, and the application they have created called a-Shell
What is a-shell and FFmpeg
a-Shell is a terminal-based application for iOS and iPadOS that allows you to run many applications in a terminal environment like Python, JavaScript, and several terminal commands that you typically expect in a terminal like ping, md5 and ssh. That isn't all it does but this post isn't about a-Shell, just one of the applications it comes with, FFmpeg. If you have not come across FFmpeg before, here is a little description from the ffmpeg website
FFmpeg is the leading multimedia framework, able to decode, encode, transcode, mux, demux, stream, filter and play pretty much anything that humans and machines have created. It supports the most obscure ancient formats up to the cutting edge.
In short, it allows you to convert between various audio and video formats, extract audio from video or even combine audio and video files together.
How to use FFmpeg in a-Shell
Ok, so how do you go about using FFmpeg in a-Shell? Well, it is as simple as opening a-Shell and typing the command ffmpeg. You can see the output of the command in the image below.
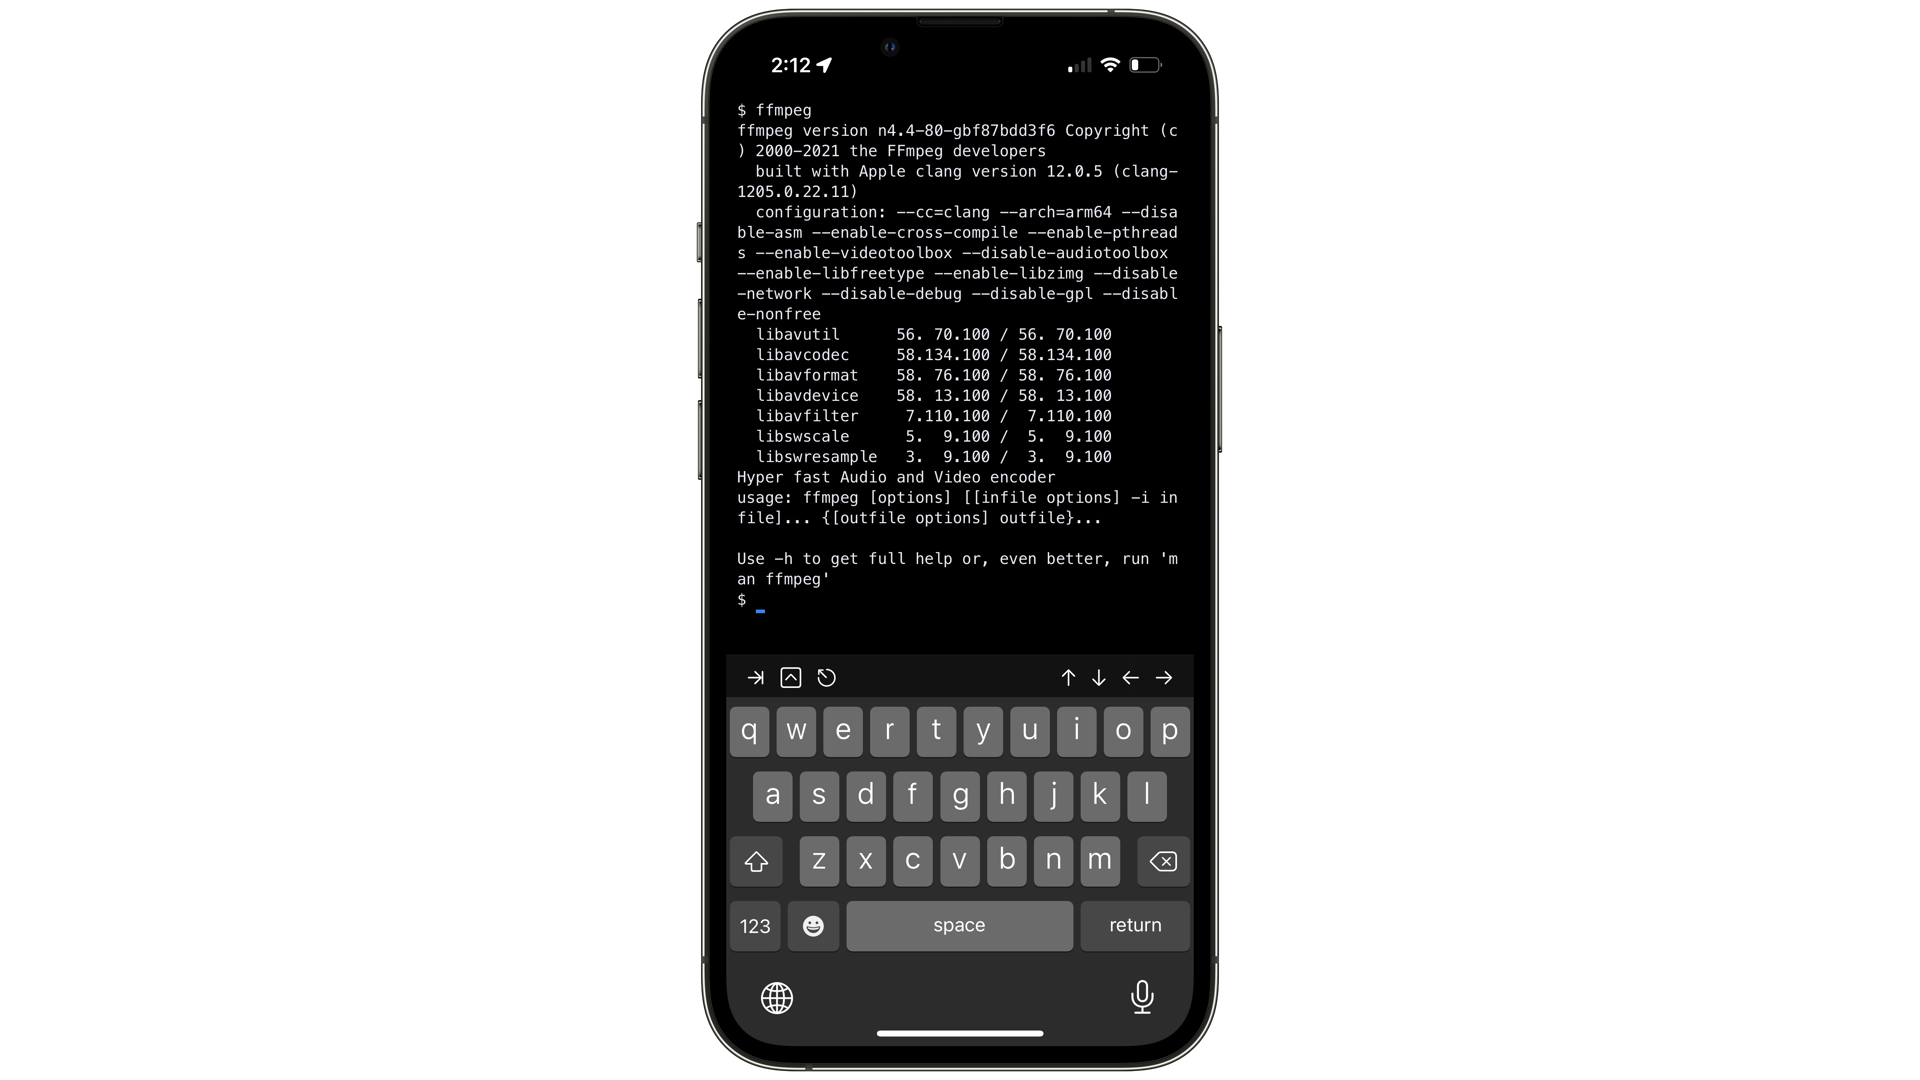
That isn't very interesting and doesn't show you how to use FFmpeg with your files.
FFmpeg in a-Shell in-app example
Now you might be aware that each application on iOS is running in its own sandbox, this means they can't just go and get files from other applications, but Apple has created ways for applications to break out of their sandboxes in controlled ways with interaction from the user and a-Shell has these functions built-in, so let's take a look.
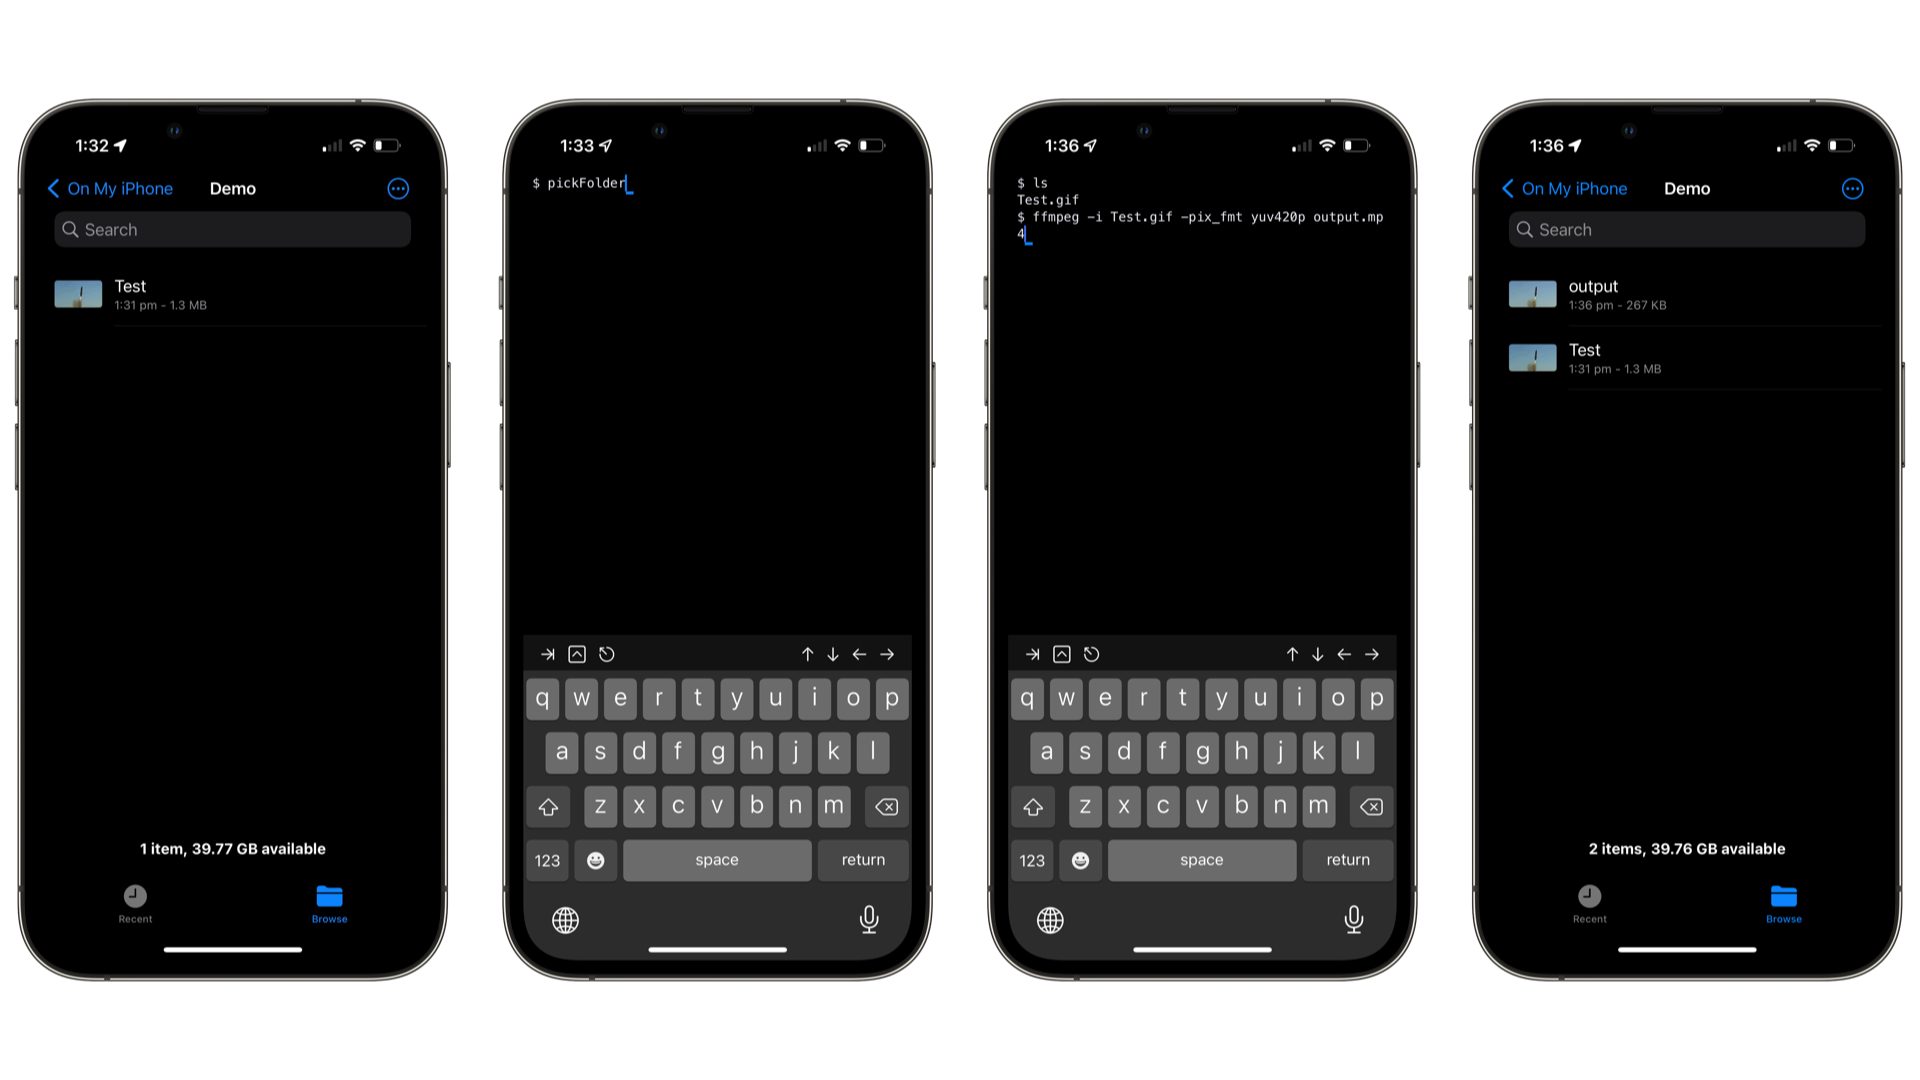
As you can see in the image below, I have a folder that contains a "gif" file called Test.gif, and I want to use FFmpeg to convert it to an mp4 file. As this folder is outside of a-Shell's sandbox, we need to use the command pickFolder to choose the folder that contains this file to process it with FFmpeg. When you run the command pickFolder, a-Shell will present the iOS folder picker, so select the folder you want to use and then you will be returned to a-Shell with the terminal context now pointing to that folder you selected. You can see that I can see Test.gif when I run the ls command now.
Now to convert the gif to an mp4, you can run the following FFmpeg command. ffmpeg -i Test.gif -pix_fmt yuv420p output.mp4
Let's take a look at the command and break it down into its parts. ffmpeg tells a-Shell to run this application -i Test.gif is telling ffmpeg that we want it to use the Test.gif file in this folder as the file to work on. -pix_fmt yuv420p tells ffmpeg to convert the input file the yuv420p format. The last part is output.mp4; this tells FFmpeg to save the converted video as output.mp4 in the same folder.
As you can see in the last part of the image, the folder contains a file named output.
FFmpeg in a-Shell shortcuts example
Here is a bonus if you have gotten this far into the post. a-Shell also has excellent iOS Shortcuts support, which means we can do a similar conversion from within the Shortcuts application. Let's look at an example shortcut, first and then I will share how you can also achieve this.
The steps in this shortcut that I will share at the bottom of this post are;
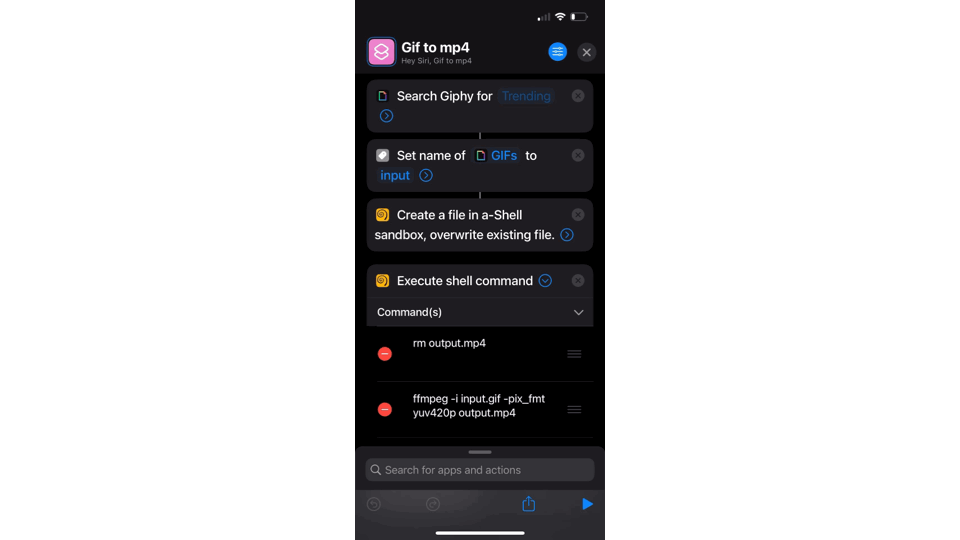
- Search Giphy for a gif to process.
- Set the name of the chosen gif to input.gif to be processed by the command in a-Shell.
- Sends the file to a-Shell so that it can be processed within the application.
- It then executes a list of commands in a-Shell
- rm output.mp4 (this is cleanup any previous runs)
- ffmpeg -i input.gif -pix_fmt yuv420p output.mp4 (this is the same ffmpeg conversion command as above)
- open shortcuts:// (return to the Shortcuts application)
- Wait to return (this tells Shortcuts to wait until the application is opened again)
- Get file (this command is configured to get the file converted output.mp4 file from a-Shell and return it to be used in the Shortcuts application)
You can get a copy of this Shortcut from here As you can see, you are now able to use the power of FFmpeg on your iOS or iPadOS device with a little bit of help from a-Shell.